Creating and shopping for other people’s talent is the one thing most of us love on Second Life. While you don’t HAVE TO appreciate other people’s good work in the form of Linden Dollars, I personally have never been happier squandering money on what I really don’t need. The pleasure to $$ ratio is absolutely unbeatable. That said:
We can transfer objects, scripts, notecards, and anything in our inventory to another user as long as you have transfer rights to that item. (This is basically a copyright, quite literally, and sometimes it is limited by the original creator. Before transferring something you didn’t create, please read their license first.) In most cases, people pack these items into a box (kind of the SL version of a zip-file, but it looks like an actual box or bag or something.) Many of these boxes are wearable, so you don’t have to find land to rezz (place) the box on the ground to unpack it, but the older the product, the more likely it is a rezz-on-ground and touch type of affair. (Wearable unpackers became a thing a lot later than some items still in circulation. Also, rezz on the ground box is a very easy, newbie-friendly way to give items to another player, so any creator’s oldest items are likely packed into a very basic rezz-on-the-ground box for sharing.)
Free items are packaged much the same way as paid items. Sometimes, you have to pay one Linden dollar, which is instantly returned to you to trigger a sales event for some vendors. You might want to get the hang of “shopping” at freebie joints.
However, if you wish to earn a pocket Linden, there are some “dance campers” on ZEN METAL land, where you’ll get paid a whooping 1 Linden to dance for 20 minutes. That’ll up my “traffic” and thus boost the popularity of the sim, and you’ve earned your Linden. ;p You can use that Linden to pick up free objects that require a 1 Linden transfer like this without having to spend or earn your own money just yet.
Buying Linden Dollars
Buying Lindens is pretty self-explanatory; in your viewer tool bar, you’ll see the button BuyL$. It’ll guide you through the rest of it. You can also earn Lindens by working on Second Life – some people make an actual living on Second Life, feeding their flesh and blood families with it, but that’s a lesson for another day.
You can also find a Linden vendor to buy Lindens that way. There’s also an online website Linden currency exchange, also for when you want to sell Lindens for fiat currency (real money) earned on the grid.
Buying an item – DEMO
DEMO objects are partly functional or functional marked/heavily branded versions of the end product, allowing you to try it before you buy. (Yes, other players can see the logo over your head.) FREEBIEs, PROMOs, and GIFTS are free items given out for promotional purposes or to just lure you in and get you hooked. <3
Most vendors work by right-clicking and picking “pay”. Some, you can just touch and a buy -window will open. Whatever way it happens, there’ll be a confirmation window to ask you if you really want to buy this item.
That said, BE VERY CAREFUL at events like Shop & Hop events (they happen every 3 months or so) when people are picking up gifts… Sometimes, those little buggars add gift-wrapped paid items up front to trick you into speeding through this confirmation window… it’s not the money, it’s the principle, but sometimes you get punished for rushed greed. ;p
If you’re picking up free objects, there’s a chance the vendor asks you if you want to buy something for 0 Lindens. Other times, the object is simply given to you without this confirmation.
Then, sometimes, as mentioned above, you have to pay 1 Linden dollar, which will be returned to you instantly, to get a gift from an intended to be vendor, for instance; therefore, having one Linden bank balance from camping chairs or dance pads may be surprisingly helpful even if you don’t want to spend money on Second Life.
What’s a FATPACK? Single color? A Texture HUD?
A fatpack means that that version includes all the available colors and alternate textures, and sometimes fatpack exclusive colors and textures for that particular outfit. That can save some dollars if you find an item you love and want to seem to be “changing clothes” when you actually simply change a texture. Then again, I’ve bought a lot of items that I could have just paid for the single color option, as there’s one clear favorite in there and I never wear any other variant available.
Changing the textures USUALLY happens from a texture HUD that is available with your fatpack. You “add” the HUD into your outfit, it will attach itself to the screen. From there, you can click buttons and change the outfit textures. Once you’re done, you can detach the HUD and reattach it when you want to change colors or prints. Removing scripts from the item, by the way, puts an end to this fun… Although removing scripts is very much recommended to reduce lag on the grid, mostly we don’t do that. If you do, take a copy of the item and apply a certain texture it, and keep the scripted version safe in your inventory.
(Removing scripts from every item you own is a dubious practise anyway, if you want to keep several colors available, it’ll blow up your inventory and that, again, creates lag, so it’s merely a question of where you want the lag to come from… A messy huge inventory or scripted avatar. I personally keep the scripts in for most outfits, and have a non-scripted avi version for special occasions that I barely ever need.)
Sometimes the fatpack alternatives come as separate items. This is typical for new creators who don’t know how to make a texture HUD yet – it’s a bit of a trick. Still, a fatpack will include all variations of the item. First thing to do is to find the outfit parts and add them all with the HUD into your outfit.
It is a good to save the attached HUDs with the outfit into the outfits folder, so when you wear it again, you can choose your colors again, then detach the HUDs but don’t save that version of the outfit as you go exploring. (To find the huds, find the ‘worn’ item you want change the colors of, right click it and find “show original” or “show in main view” depending on what window you’re looking at. For this reason, it’s unadvisable to mix the original folders because you might want to find something from that original package. Once you find the folder the item came from, find the HUD and attach. Also see: Inventory tricks.)
Rezzing (land required to unpack)
Sometimes, your product is sold in a rezz box. For this reason, you’ll need to be on land you’re allowed to rezz items on.
The land you can rezz on is usually called “a sandbox.” You can find many of them in the Places Search in your viewer. Here’s ZEN METAL Sandbox.
Also, speaking of places to rezz stuff at, there’s a whole list of Linden mainland rezz zones intended for rezzing your cars, bikes, horses, boats, and such, but they also work as unboxing locations if you like. (They also have been known to be used as a temporary house location… But I’ll tell you about those later.)
If rezzing is not allowed on the land you’re currently on (like the vendor’s own sim) you’ll see this box icon with a banned mark on it. The other icons mean that “pushing” is disabled, there’s no voice chat allowed, and the parcel isn’t landmarked by you. If the land you’re on has this box icon visible, you’ll need to find another spot.

The box icon is completely missing where you CAN rezz:
![]()
The other icons mean people on neighboring parcels can’t see people on this one, voice is disabled, and you’ve got this location landmarked.
How to unbox
![]()
Find the item you just picked up in your Inventory. CTRL+I or suitcase icon. It’s in the Recent Folder if you got it before logging out last.
Drag the box onto the ground (as you’d expect, grabbing it with your mouse).
Touch it, and it should send it to your inventory OR it will open another window that will also give you an option to “copy contents to inventory” OR “replace current outfit with contents.” Do the latter if you bought a complete avatar.
The unpacked stuff is also in the Recent Folder, but now in a folder of it’s own. If you can’t see it, touch the + -icon in the Recent Folder to open all folders and see if you can locate it, or use the search bar if you have any idea what to look for, lol.
Now, you can use the contents, but let me first explain other methods of unboxing.
Unpacking from a worn object
To avoid requiring one’s customers to find land to unbox objects on, some vendors use a wearable HUD (heads up display) to help them unpack items. They can be worn on the avatar like a bag or a gift box, OR it attaches to your HUD (screen). Either way, you touch it and it sends the items to your inventory (Recent Folder).
 Save Outfit
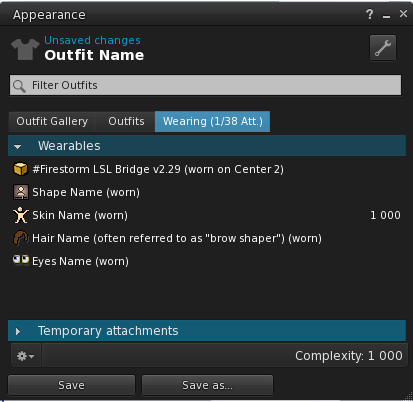
If you sort of semi like the way you look now, and want to make sure you can return back to this look later, use the T-shirt icon to save your current look. It will save everything – open HUDs, (user-created screen tools), skins, makeuplayers, everything you currently wear.
The Outfit inventory is rather self-explanatory, but as a cool feature you might not realize, is that you can upload a photo of the way you look into the first tab index. Granted, it’ll cost you 10 lindens a photo if you’re not a Premium Plus member, but what is that in real dollars? Navel fluff?
Wearing/Attaching clothes.
So, back in the day when Second Life was but a newborn, there were clothes you wore and items you attached to your avatar, but now, technically the mesh clothes are also “items.” Basically boxes and cylinders, not clothe. ;p Anyway, as a general rule of thumb you never NEED TO “wear” anything. You can always ADD things to your outfit. Still, technically, sometimes the old “wear” is used in language, but you can always ADD instead.
The reason why you want to avoid using “wear” wrong, is that it defaults to attaching the item into your right hand. That, in turn, detaches everything else you might be wearing in your right hand, like your pants. “Adding” doesn’t care how many objects you’re wearing in the same attachment point. Therefore, “wear,” I feel, is a little redundant, as you can still “add” system parts just the same, so I don’t even know why that annoyance is still there – perhaps to offer script support, but should be removed from menus, if you ask me. Anyway.
When you want to take items off, you can “detach” or “take off” items, but certain things, like the system skin, hair, shape, and eyes cannot be taken off, they can only be replaced by adding another skin, hair, shape, or eyes.
You can go to the Worn tab and click “remove from current outfit” whatever you don’t want. (It sometimes takes some time to remove everything. I just sat here dismayed for a while before anything happened, thought I was going insane. Anyway.) This is as naked as you’ll ever be.

If you’re curious of what you’d look like in the very rudamentary avatar, open that “outfits” tab, and add “new body parts”, shape, skin, hair, eyes, and then new clothes on that, and see if you appreciate what mesh creators have done for you. ;p
You can also start creating your own system/bom layers quite easily if you have it in you. What you need is the system layer templates and then just… Colour them in.
“Add to outfit” “Wear – Replace outfit” “Remove from outfit”
The inventory offers pretty self-explanatory commands such as these. You can add a folder full of items or each item separately as you’d expect. Some time on a sandbox will teach you rather fast how the avatar anatomy works.
OK, you’re all set.
First, grab yourself a body you like and then, find clothes designed for it.


